This simple tutorial is intended to help you, our fellow teachers, in making tarpapel in MS Excel. Due to an increasing demand for making a tutorial in printing out a tarpapel, here are the simple steps with photos.
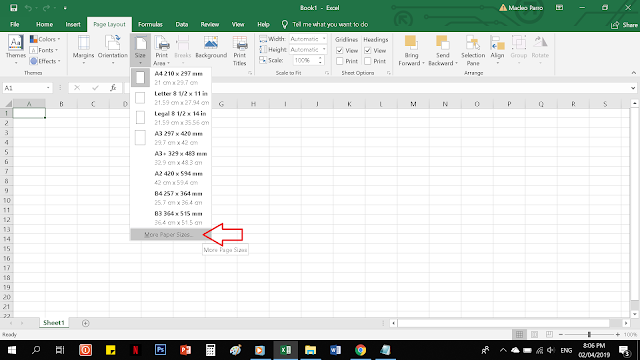
STEP 1. Open your MS Excel. Go to page layout, more paper sizes.

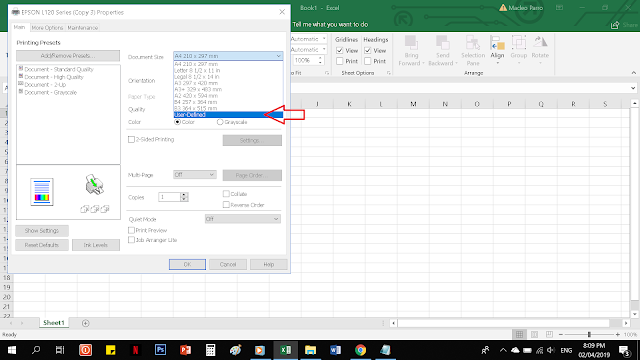
STEP 2. Click on options.
STEP 3. Document Size, click User Defined.

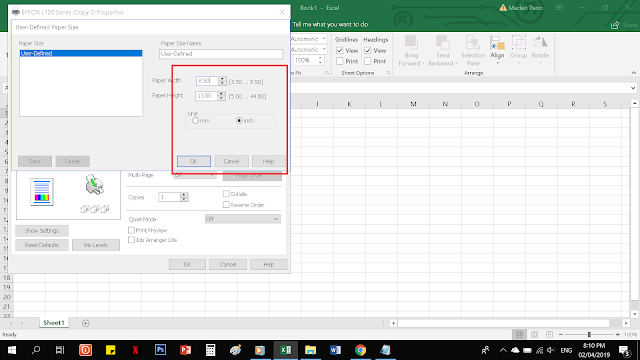
STEP 4. Set by inch, 8.50 x 13.00 then click OK. (Note: most tarpapels are printed using long bond paper)

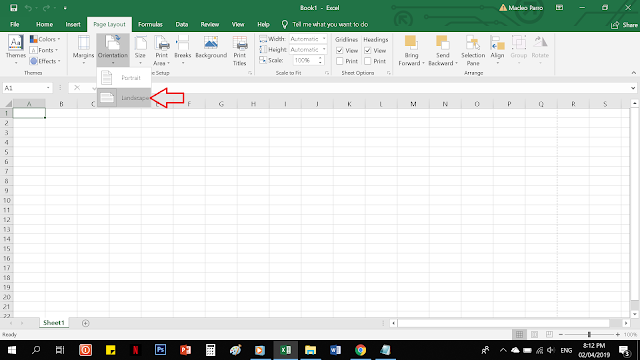
STEP 5. Page Layout. Choose Landscape (Depends on how you want your tarpapel to be printed)

STEP 6. Set Margin. 0.5 inch on all sides is what we suggest.
STEP 7. Insert your Image Design. Adjust your image to your preference or to how many papers you would like to consume as shown. PRINT.
FREE DOWNLOAD: Instructional and Reading Materials (download)
STEP 1. Open your MS Excel. Go to page layout, more paper sizes.

STEP 2. Click on options.
STEP 3. Document Size, click User Defined.

STEP 4. Set by inch, 8.50 x 13.00 then click OK. (Note: most tarpapels are printed using long bond paper)

STEP 5. Page Layout. Choose Landscape (Depends on how you want your tarpapel to be printed)

STEP 6. Set Margin. 0.5 inch on all sides is what we suggest.
STEP 7. Insert your Image Design. Adjust your image to your preference or to how many papers you would like to consume as shown. PRINT.
FREE DOWNLOAD: Instructional and Reading Materials (download)
Easy Way to Make Tarpapel in MS Excel
 Reviewed by Anonymous
on
April 02, 2019
Rating:
 Reviewed by Anonymous
on
April 02, 2019
Rating:


No comments: